This is a behind-the-scenes post about the Butt Cage tie. We will cover the source image used, the tracing process, and the final steps to complete the tie. This post is intended for intermediate riggers or beginners who are moving to the intermediate level. If you are a complete beginner, this post may not provide you with all the information you need to successfully complete this tie. Instead, it will give you a glimpse into the tying process and show you how intermediate riggers approach tying.
Final Tie Images
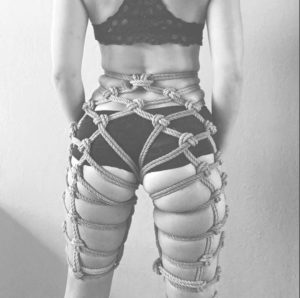
Source Image
Here is the image that I used to learn how to do this tie. It is from @ropebunnyties on Instagram, and it was very helpful for me because butt ties can be challenging. Seeing a tie that has been successfully tied already gave me a good starting point.
Analysis /Tracing
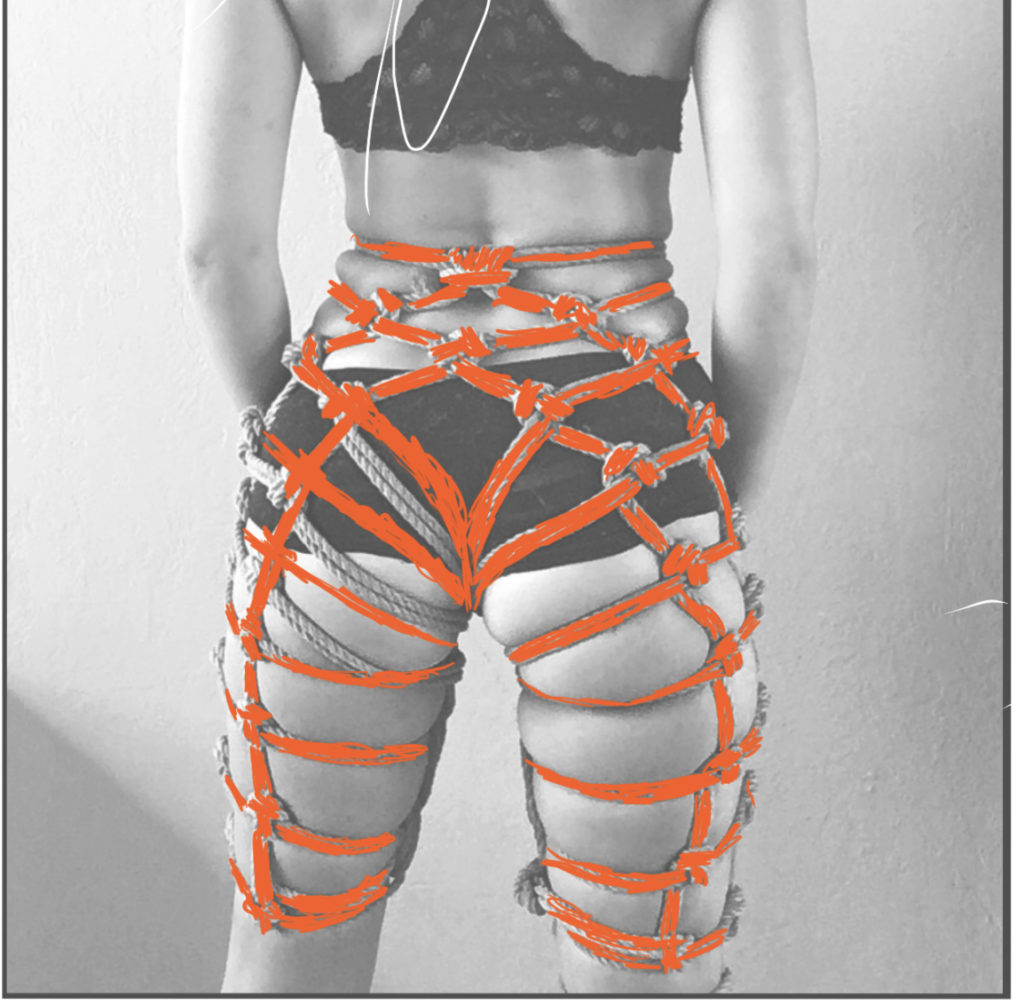
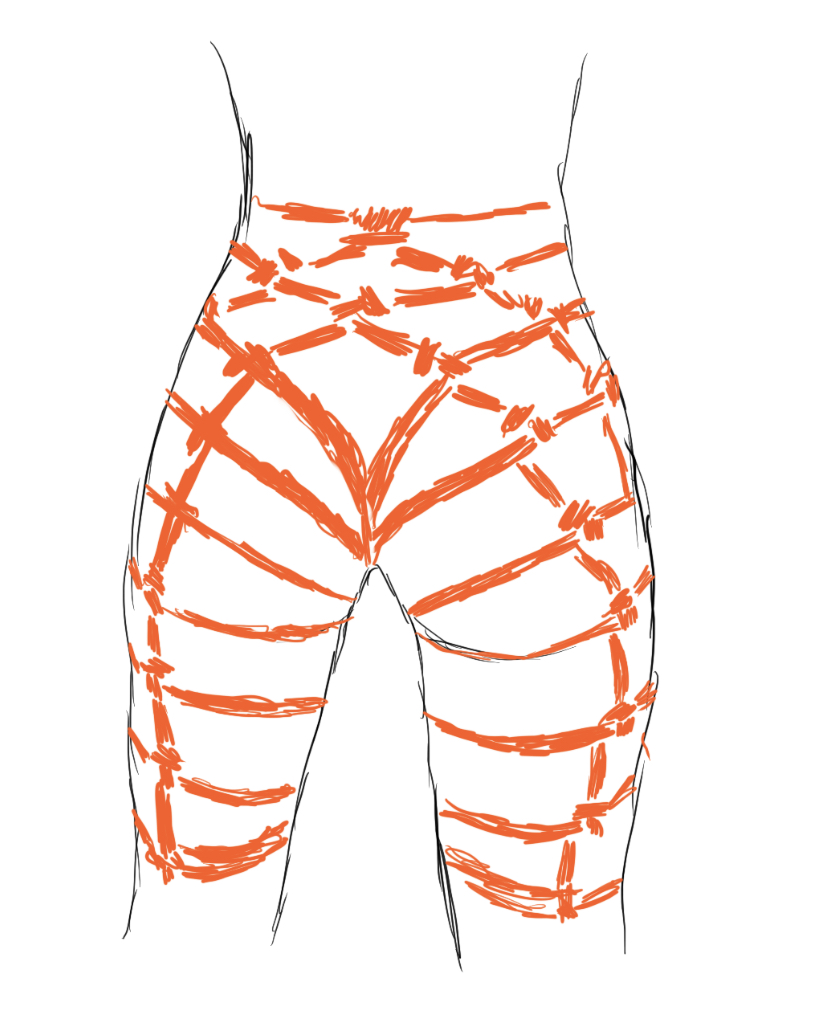
Tracing the tie helps me understand its structure and design. I often take a screenshot of a tie I like and import it into a drawing app like Procreate on my iPad. By adding layers, I can trace over the image to visualize the ropes and see where they exit and reappear. After I finish tracing, I remove the original image, leaving only the traced tie. This technique helps me better understand the steps needed to tie the tie.
Determining Tying Steps
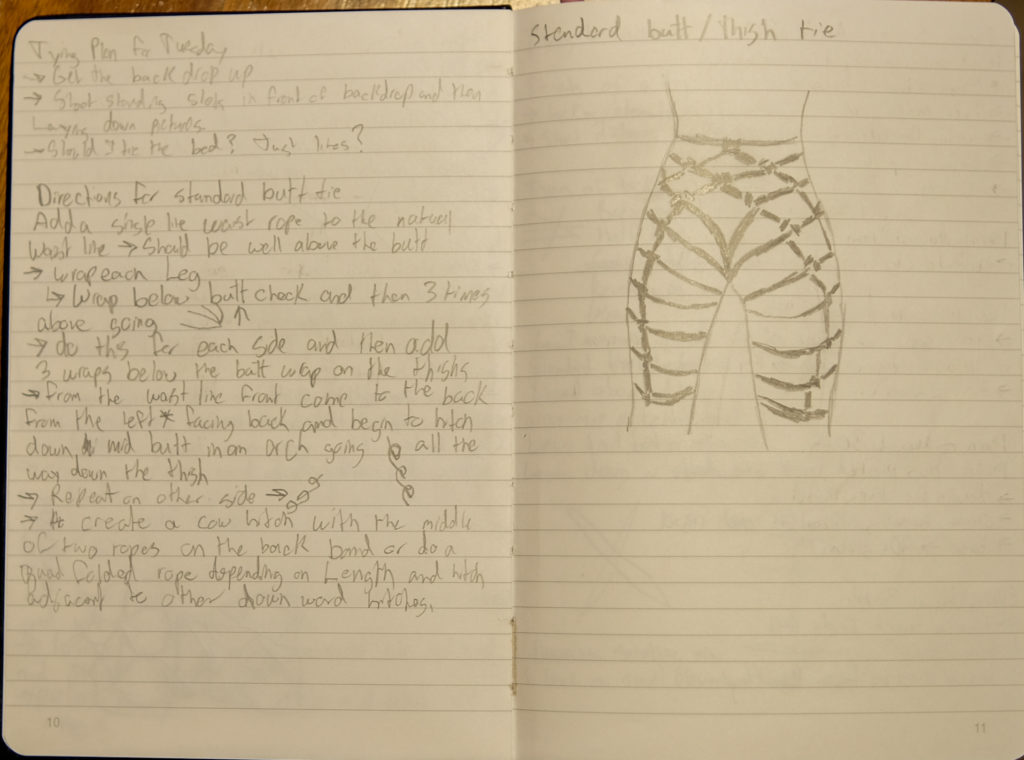
After tracing the tie, I had a better understanding of the rope path and movements. However, I still didn’t know exactly how to tie the tie. To figure this out, I transferred the tracing to my notebook and studied it carefully. This allowed me to come up with a set of precise steps for tying the tie. Although this is an optional step, it helped me ensure that the tie would succeed. I transferred the tracing by increasing the brightness on my iPad screen and placing it under the page in my notebook. Then, I traced the image from the previous step.
Even with the steps I created, this tie was still very challenging for me, especially when it came to keeping the rope from rolling while doing the butt wraps. Once the hitches were in place, though, the tie became very rigid and durable.
Below, I have added the traced images and highlighted the order in which they were tied.
Tying Guide
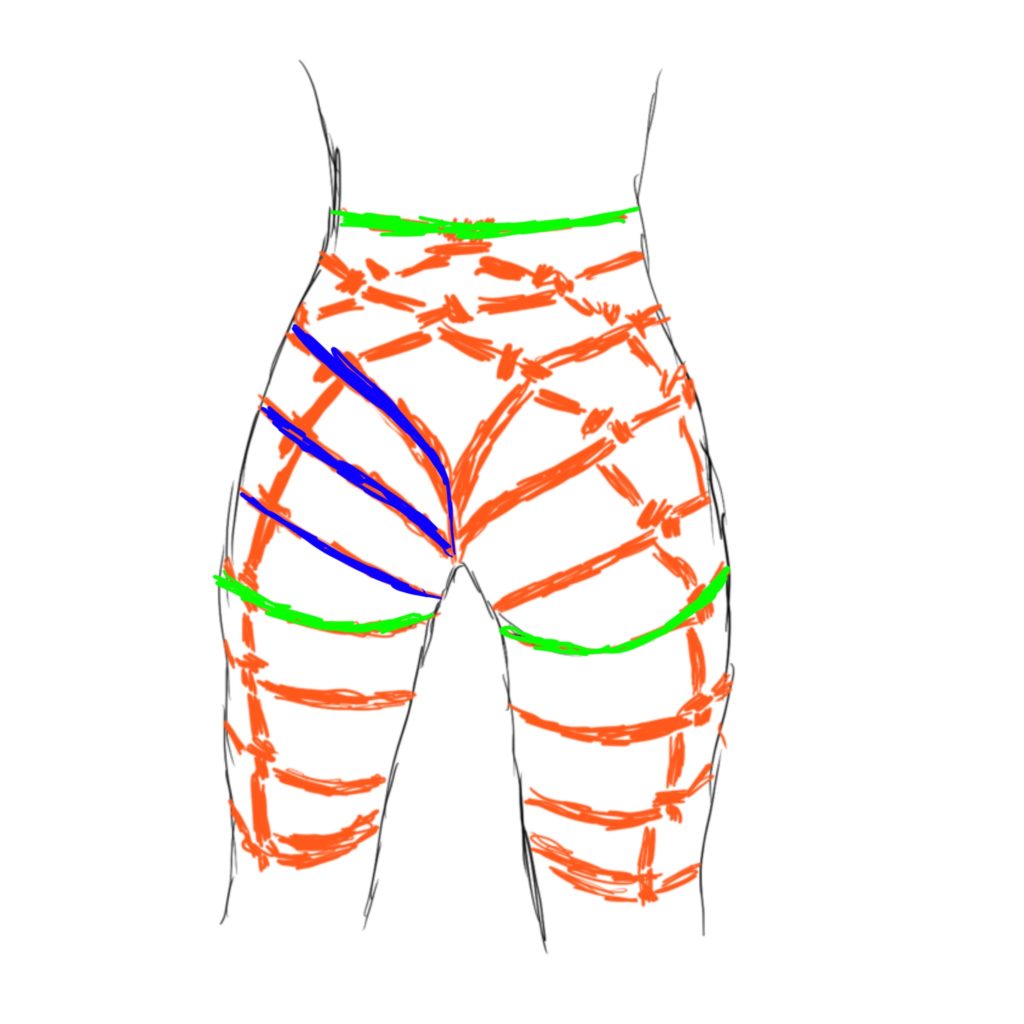
Step 1: Lime Green
The first wraps are done around the natural waistline and below the butt cheek
Step 2: Blue
Then from the butt wrap three wraps are added above it on the butt. This is then mirrored on the other side.
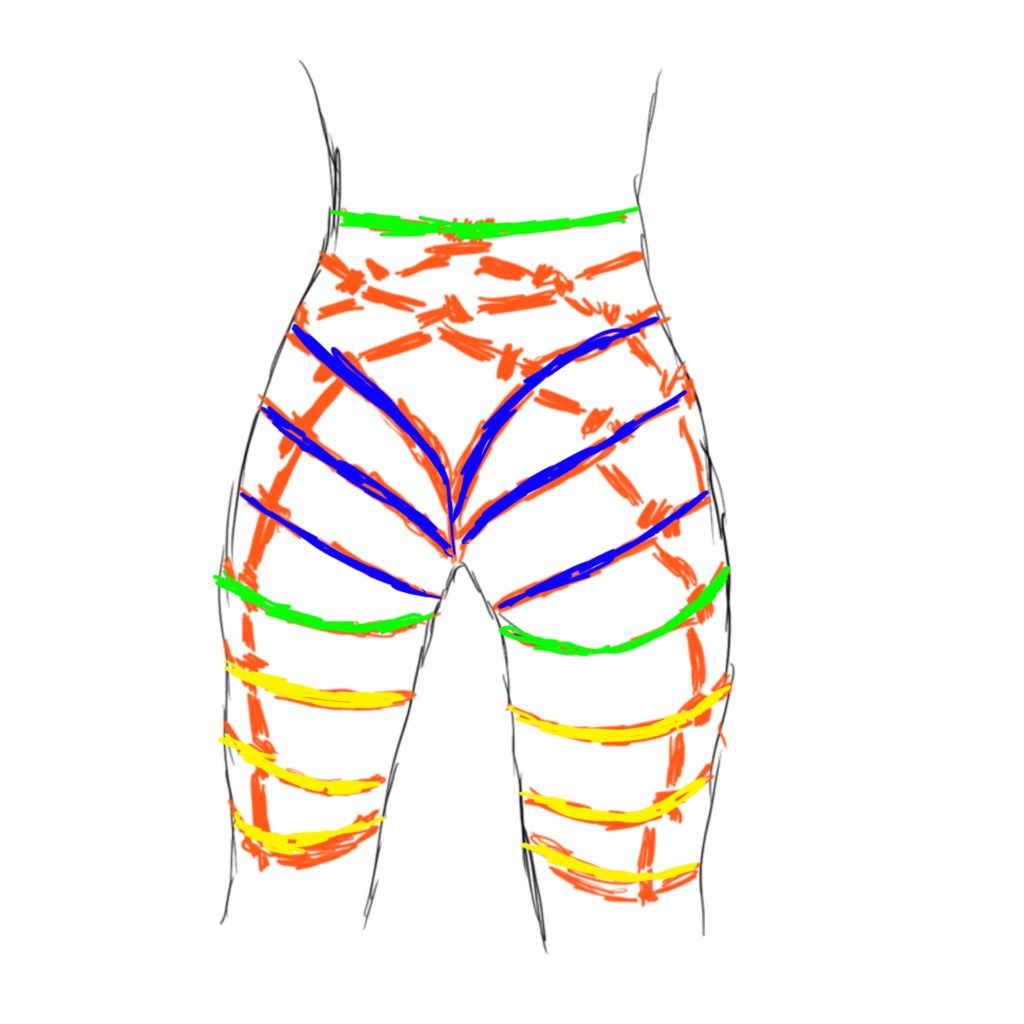
Step 3: Yellow
After the butt wraps three more wraps are added below the butt cheek wrap. This is mirrored to the other side.
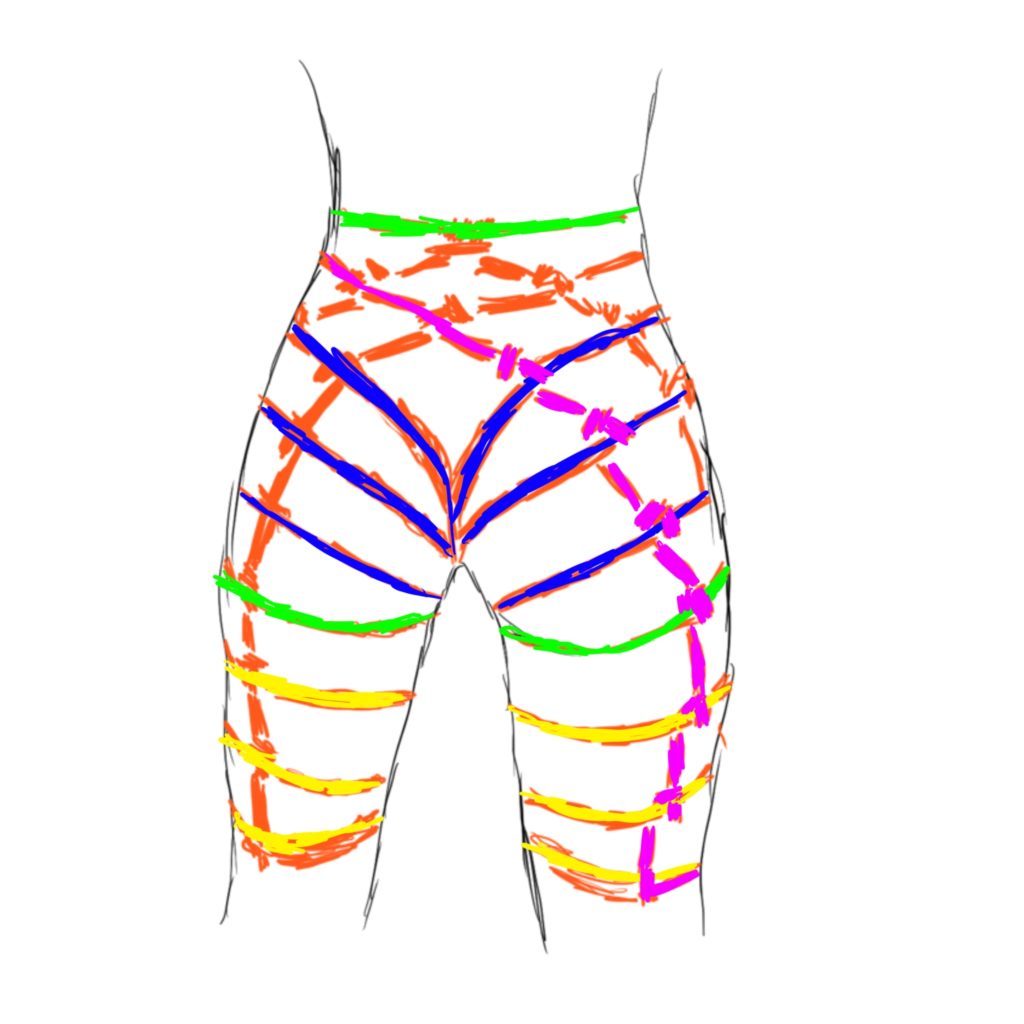
Step 4: Magenta
Once all butt, waist and thigh wraps are completed a line comes from the top left and half hitch on all lines down the butt / thigh ending at the bottom thigh wrap. This is then mirrored on the other side.
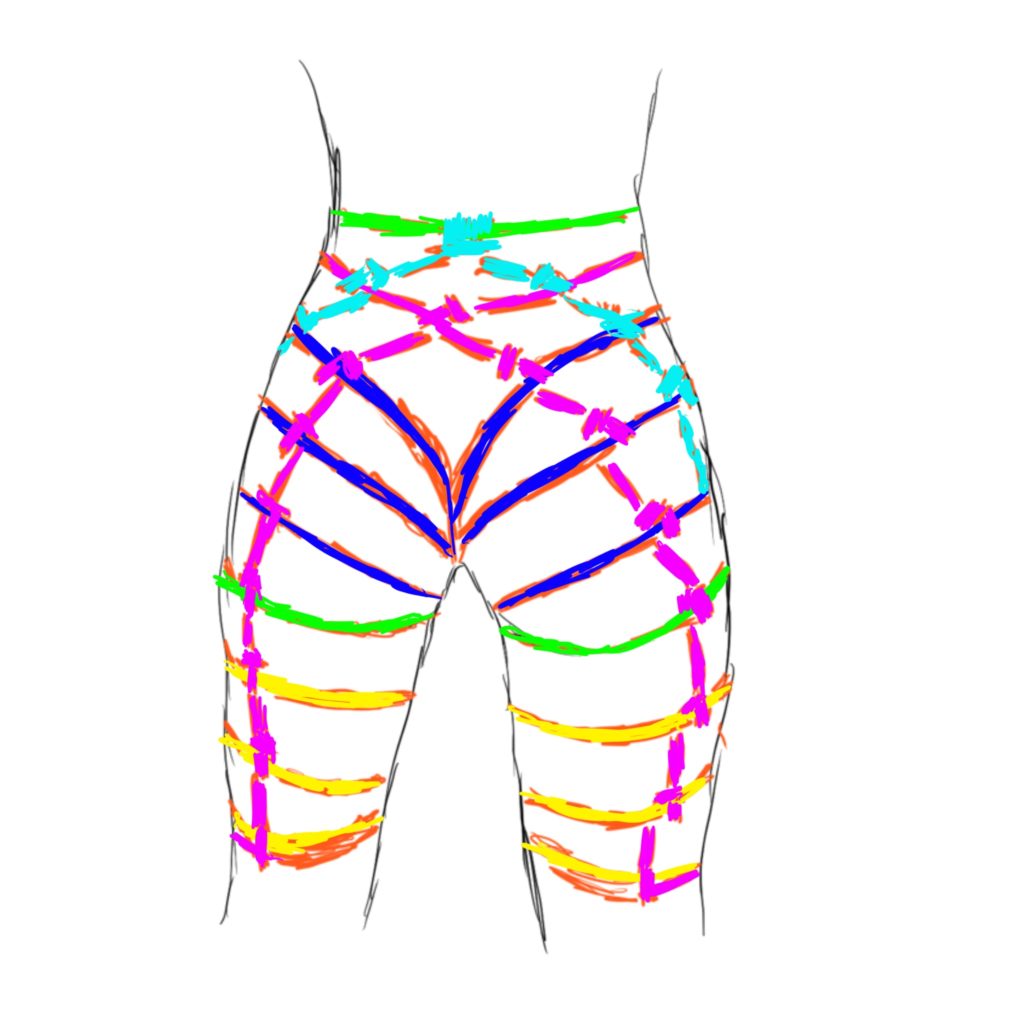
Step 5: Cyan
A new rope is taken and used to create a cow hitch at the center of the waist line wrap. The two tails are then taken and hitched down the outer thigh and down to the bottom.
Final Results
Support Texas Shibari
If you enjoyed this post or found it helpful, please consider supporting Texas Shibari by visiting our Fansly page or making a donation. Your support and donations will help us continue to produce free tying guides for the community. Thank you for your support!
