This post will take you behind the scenes of loop chain tying. This guide is intended for intermediate level riggers, and it will be helpful if you already know how to tie loop chains, but it is not necessary. We will cover two main methods of performing loop chains in this guide. Whether you’re a beginner looking to improve your skills or an experienced rigger looking to learn new techniques, this guide will provide you with the information you need to create beautiful and complex loop chain designs.
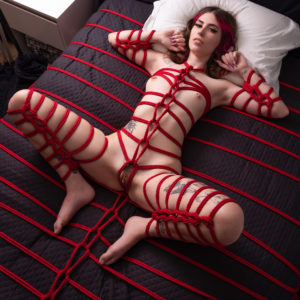
Loop chain examples
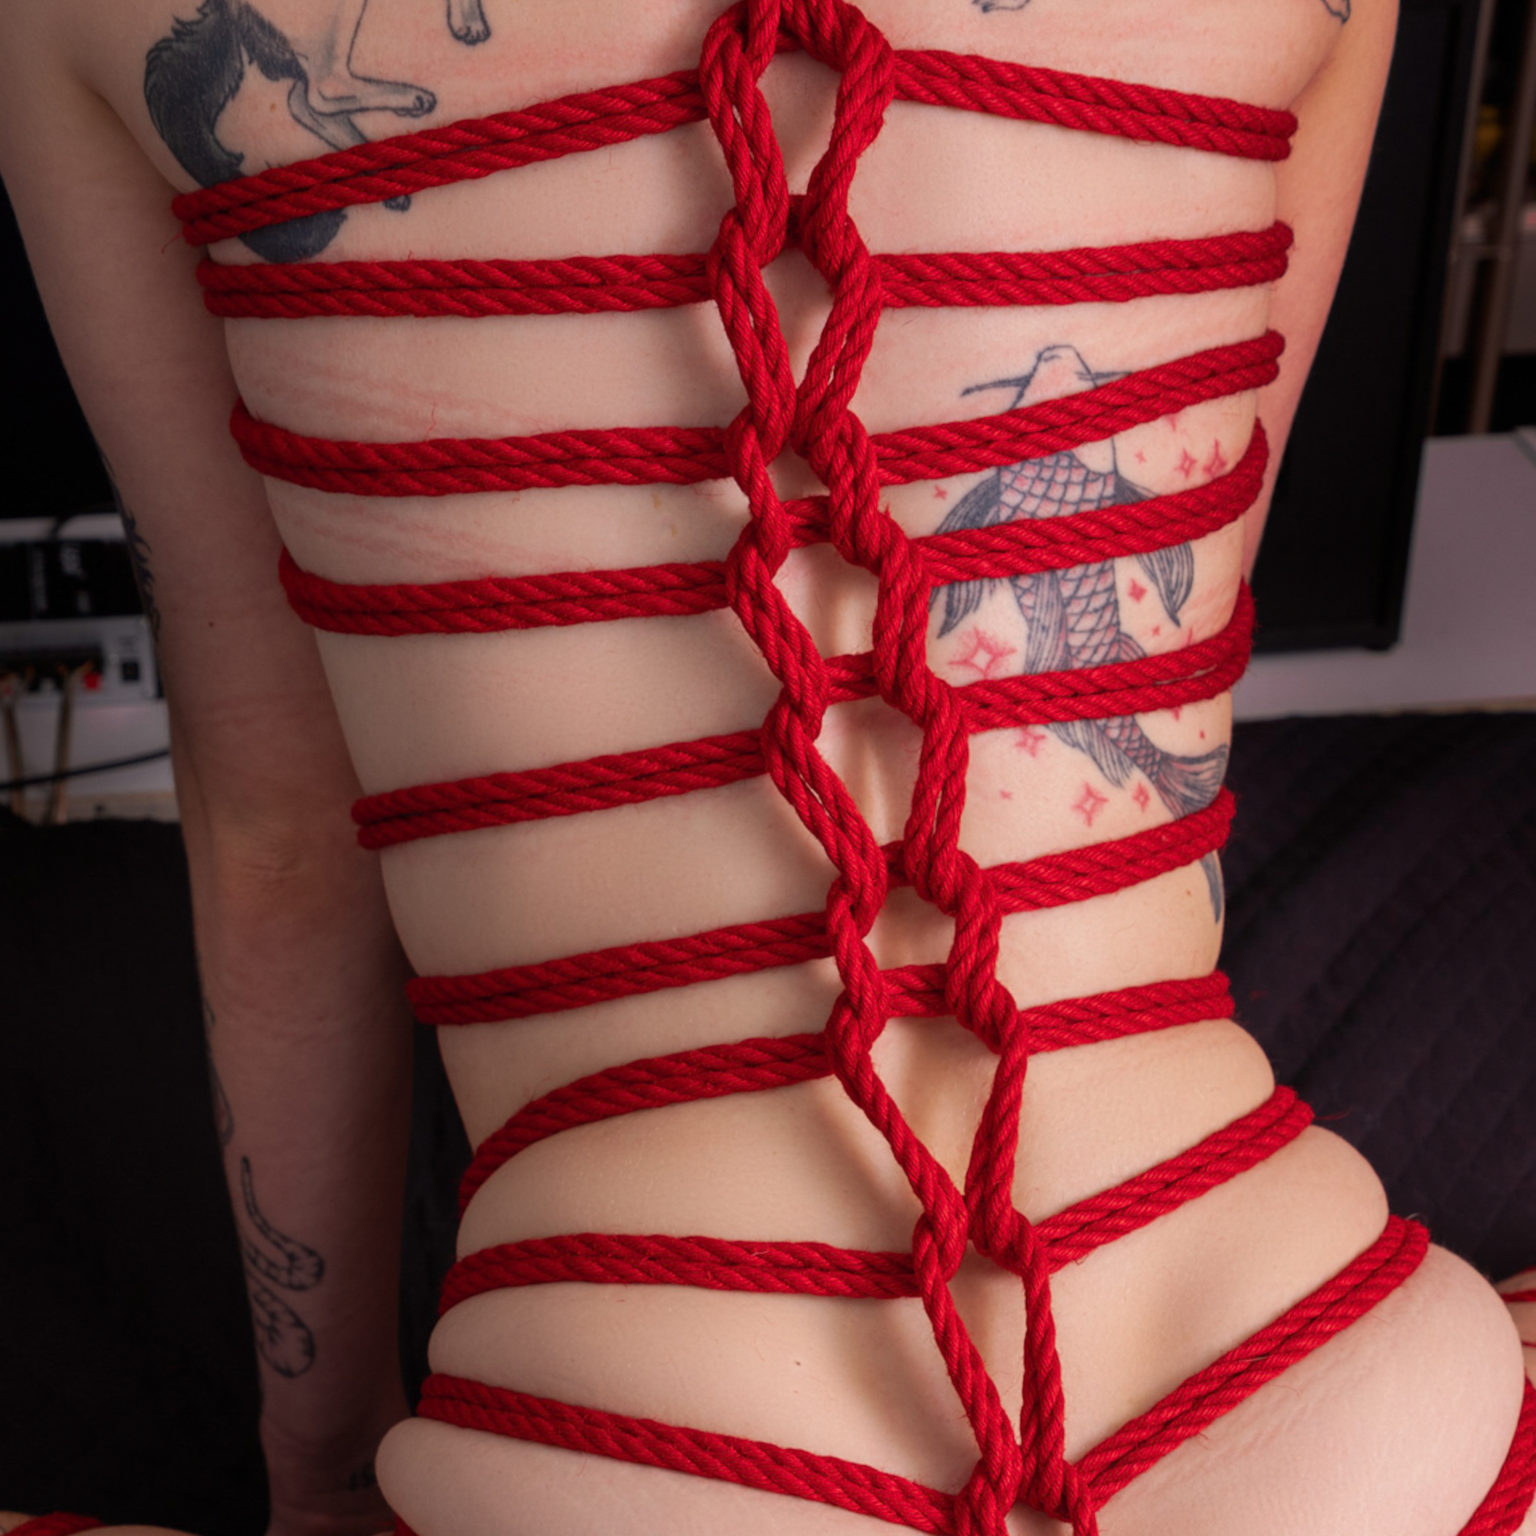
Method 1: The Real Loop
To begin a real loop chain, you will need to start with a loop and then go around the torso or column, pulling a bit of rope through the loop and repeating this process to form a chain of loops. This method is great for quickly covering large areas, such as the torso. However, it can be difficult to perform a real loop chain on smaller body parts or areas. This is where Method 2 comes in.
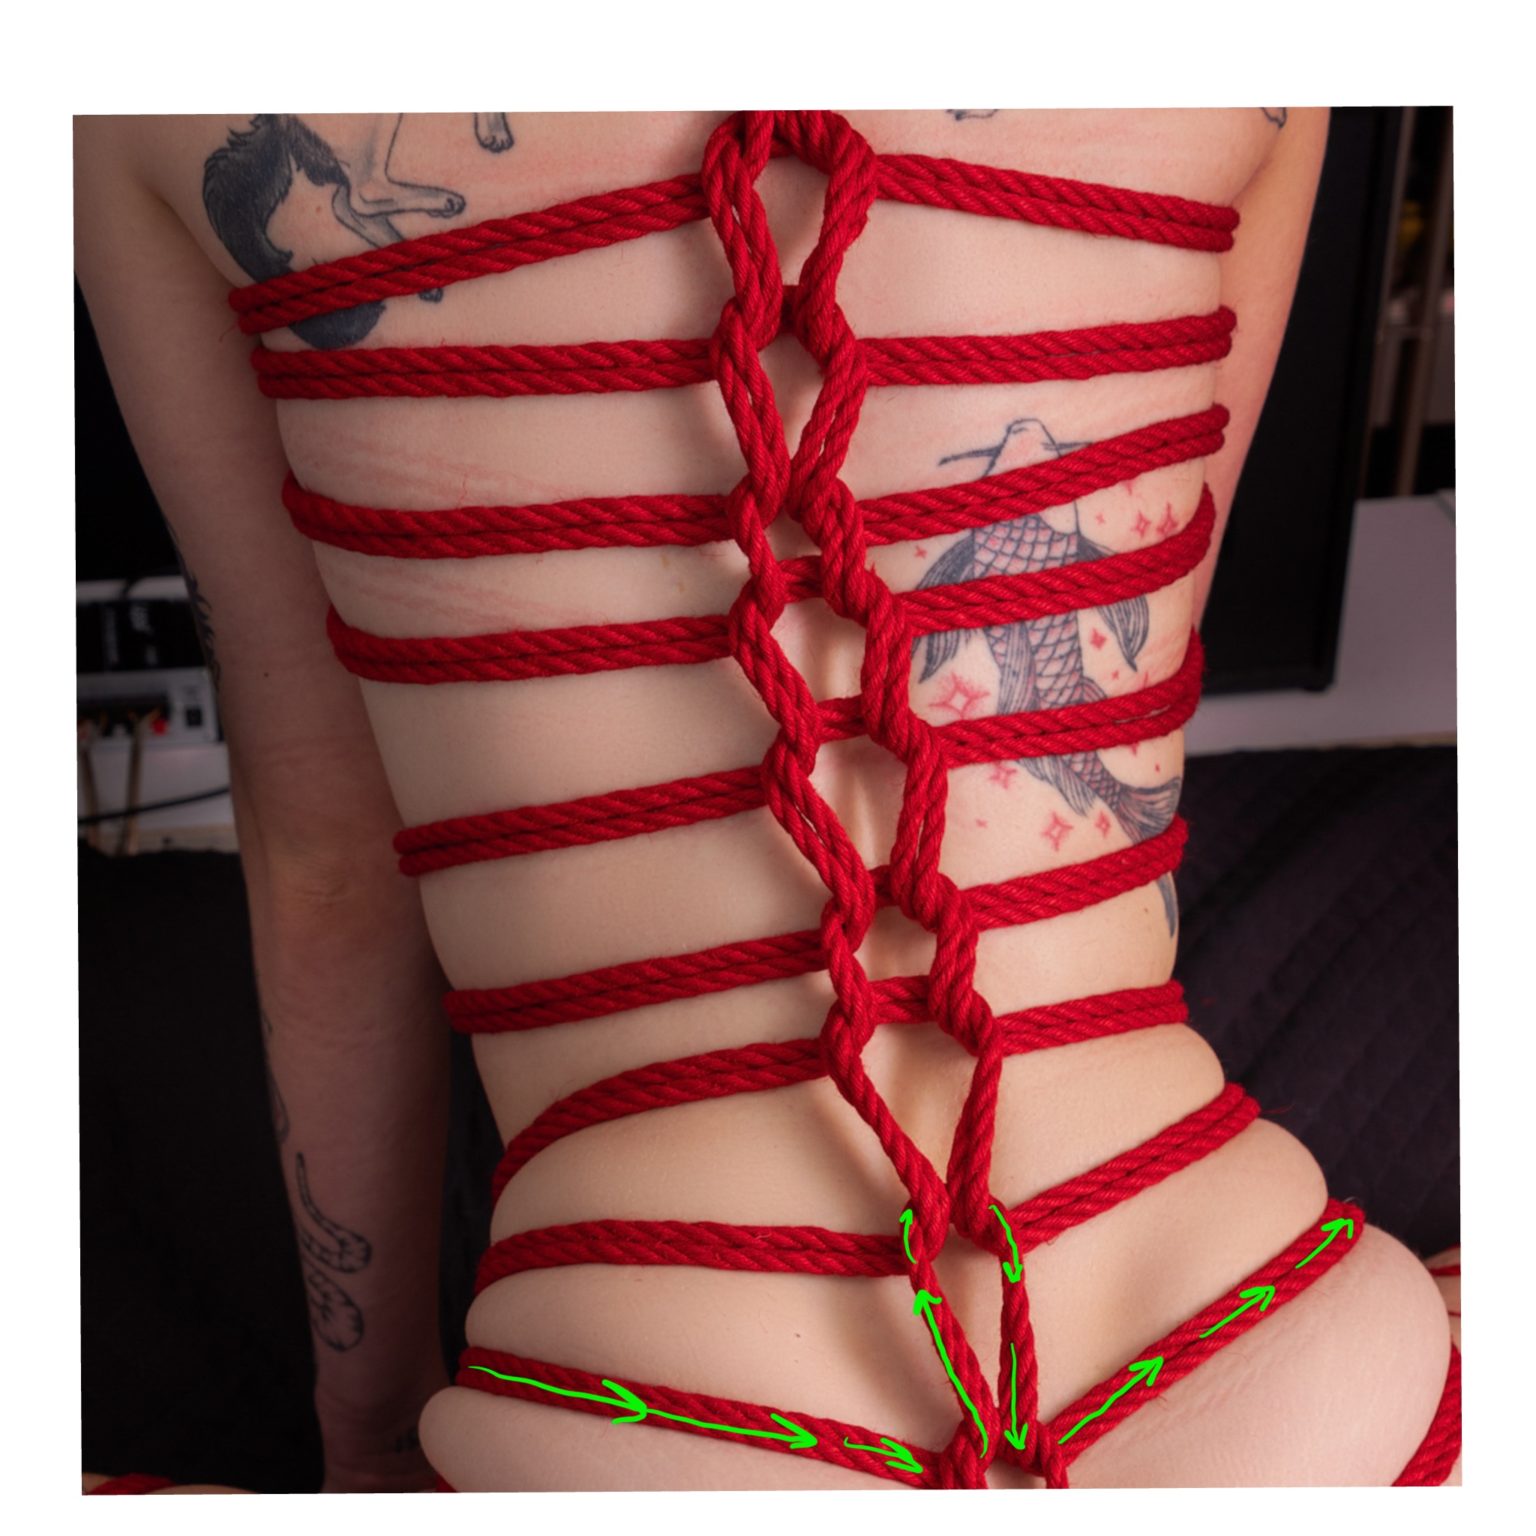
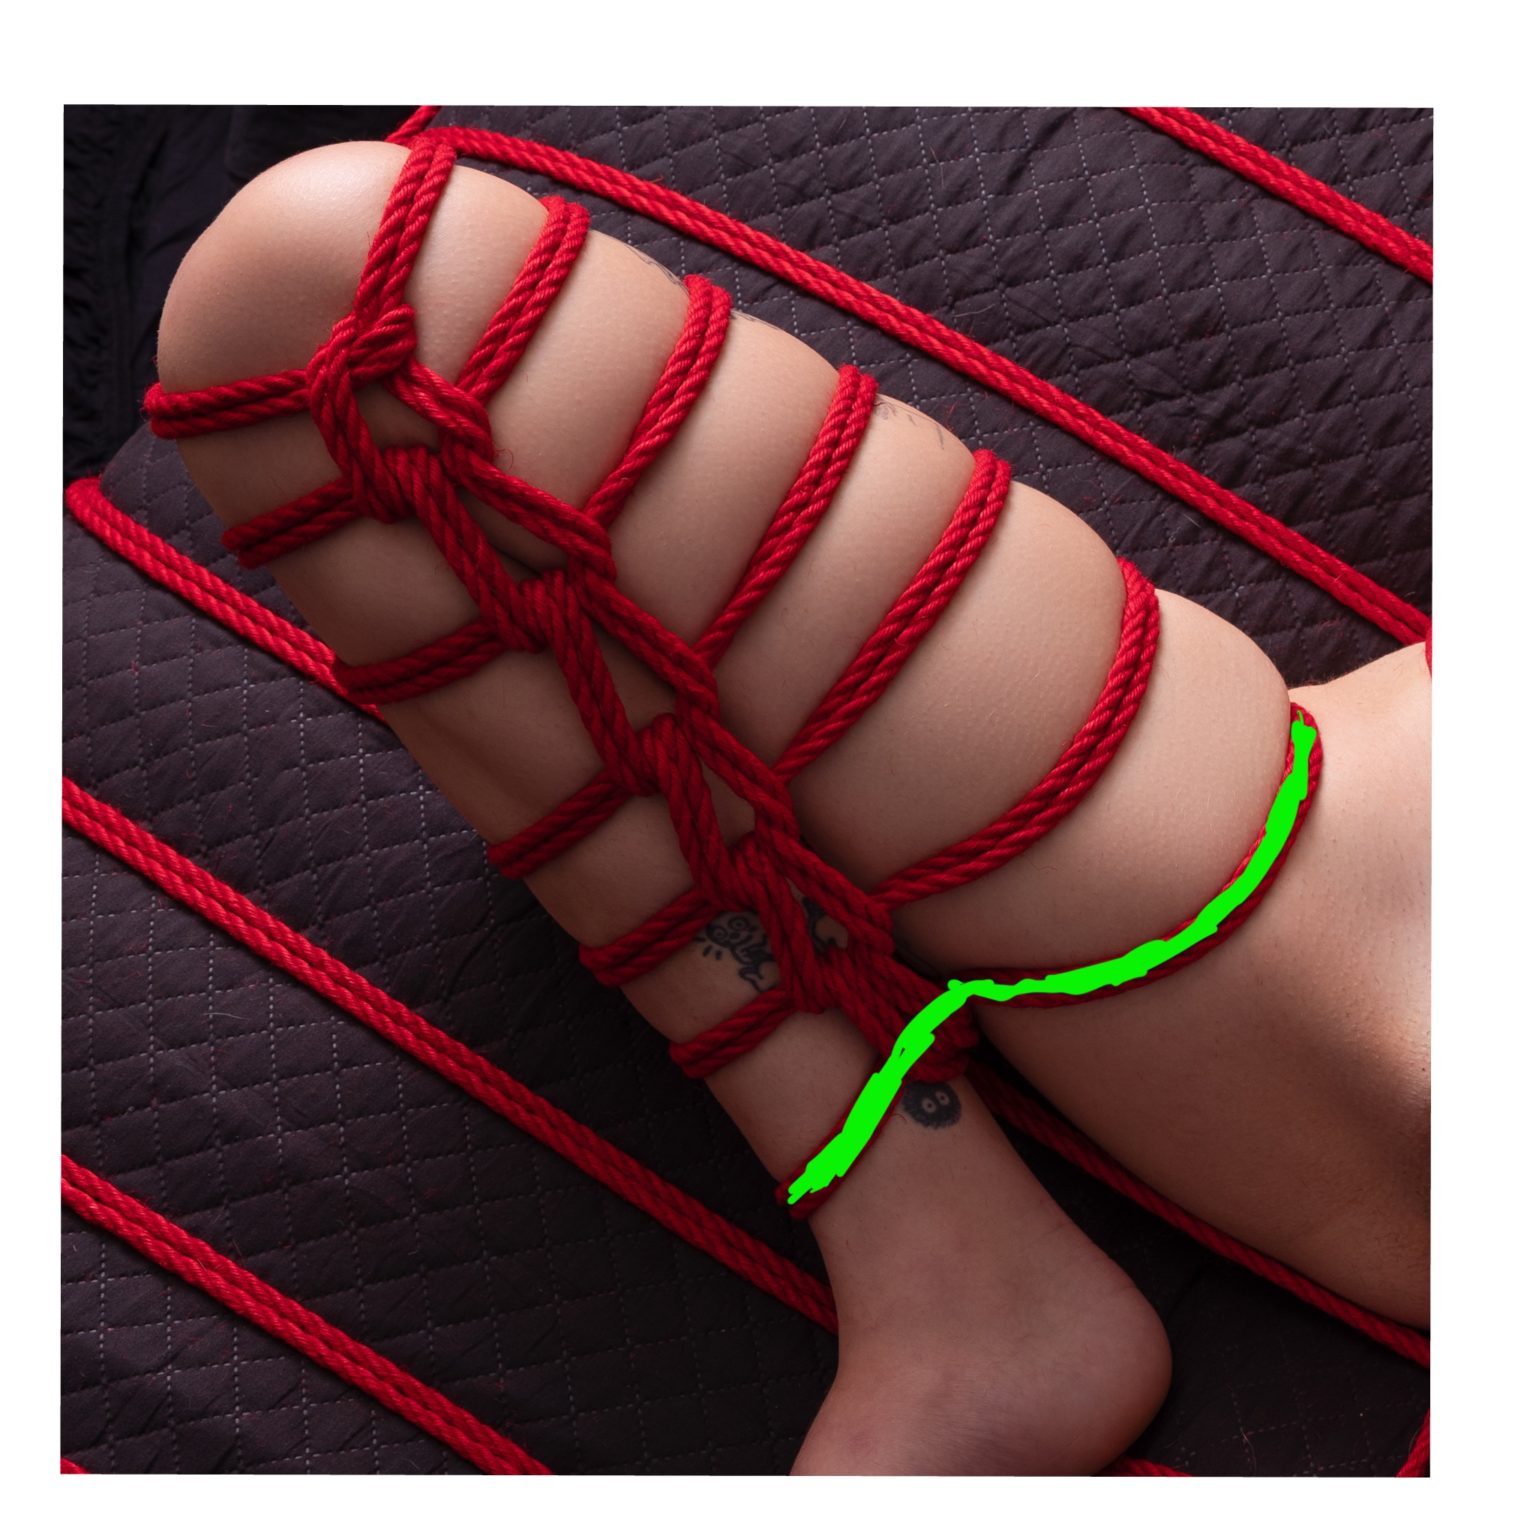
Real Loop Tracing
Step 1: Green
Pull a section of the rope through the existing loop and wrap around the body.
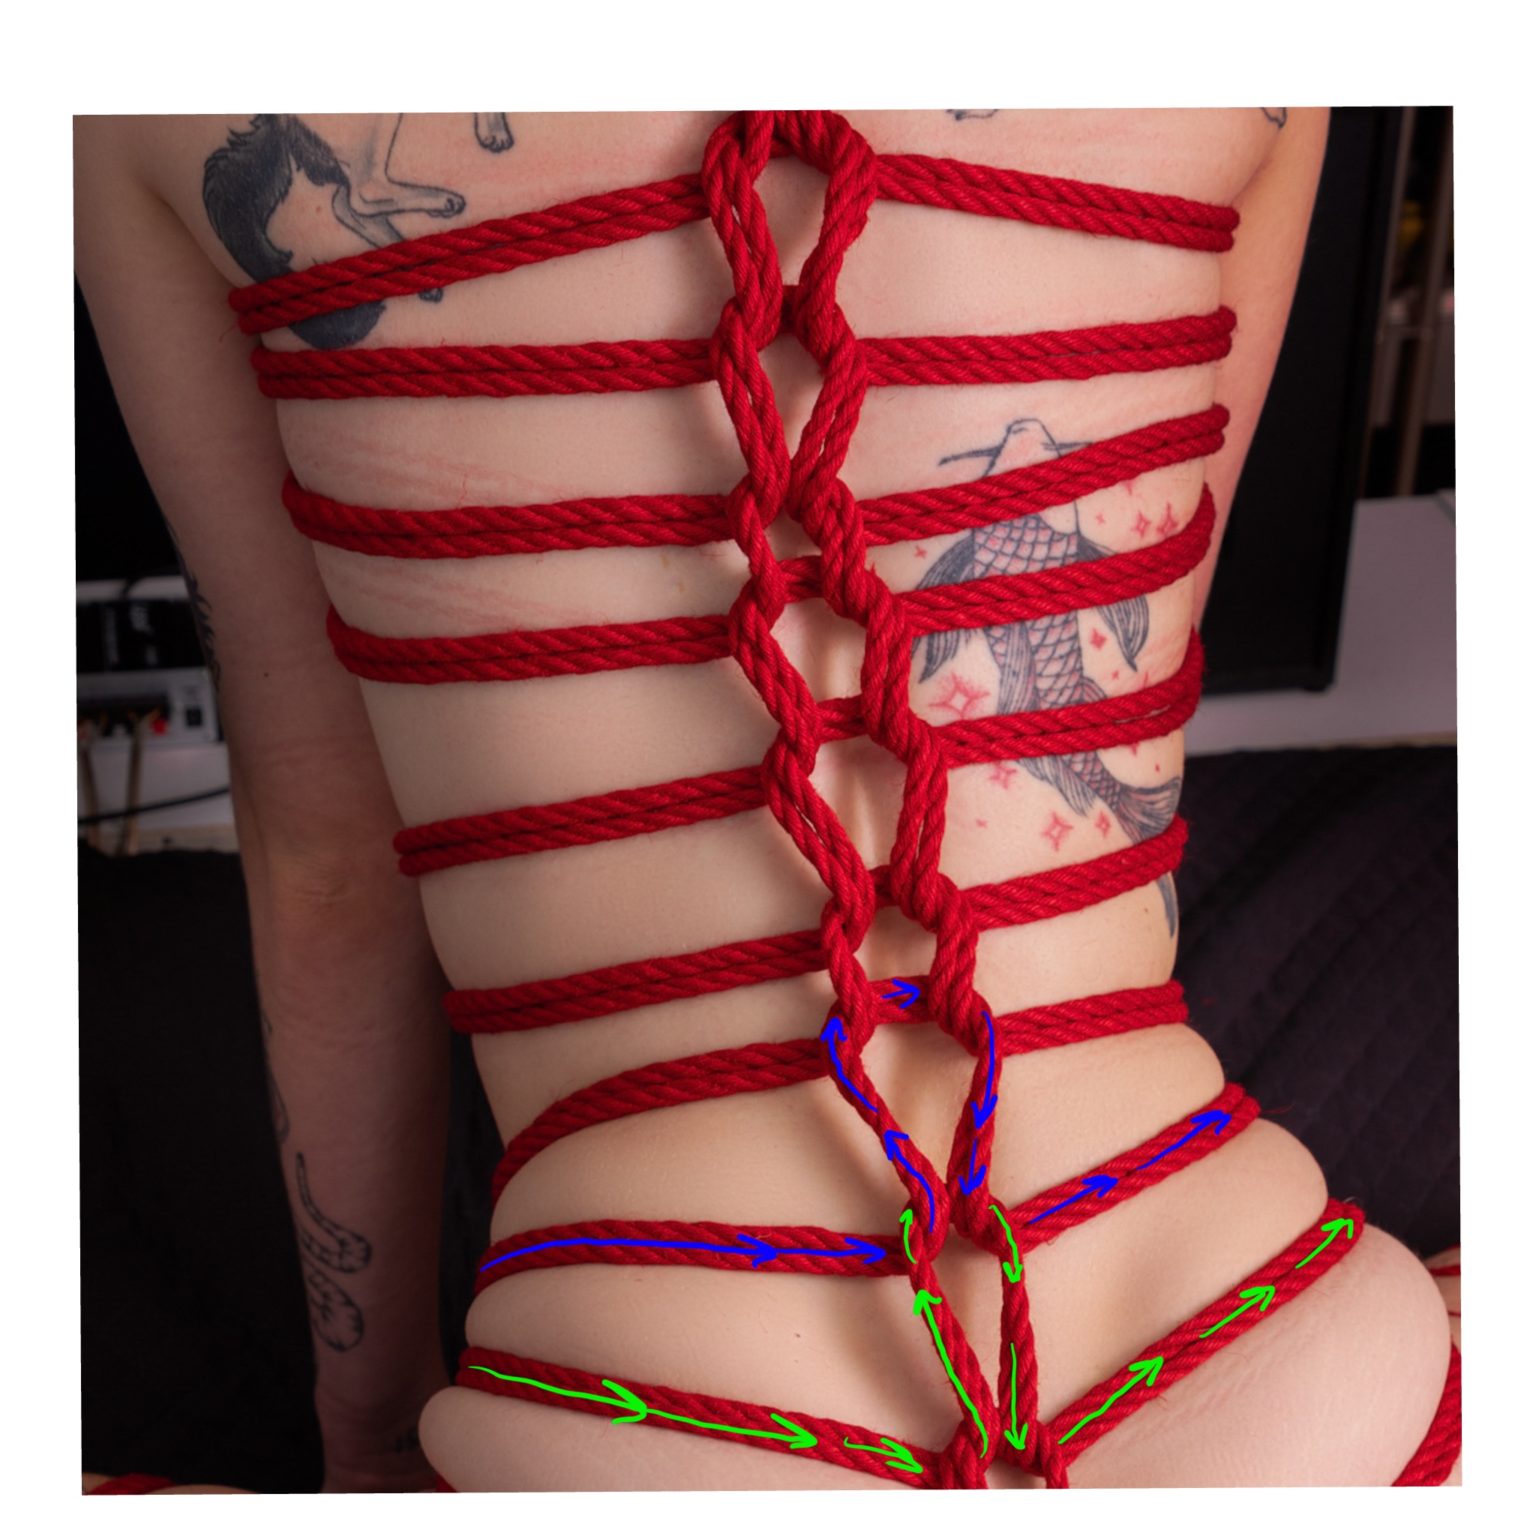
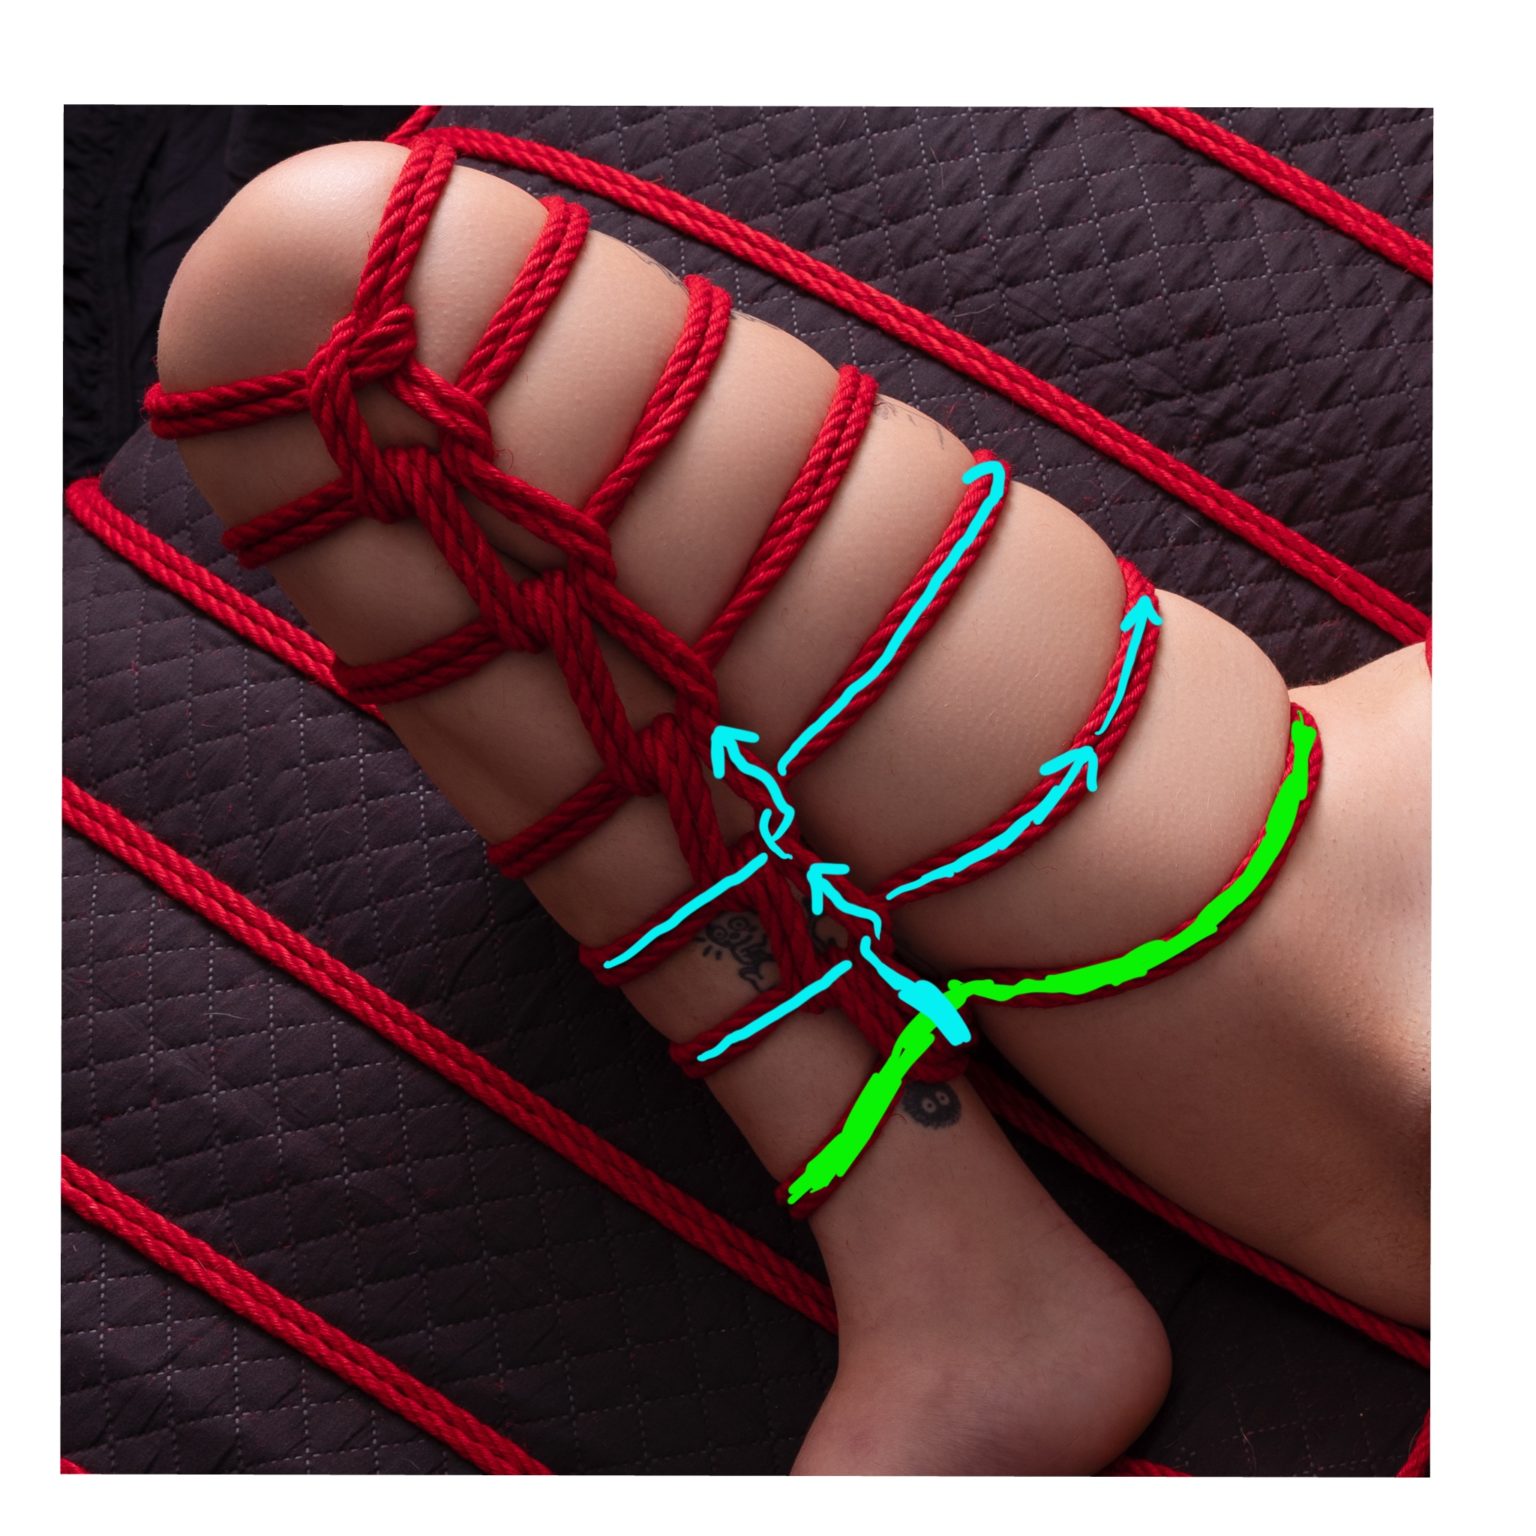
Step 2: Blue
Wrap again in the same direction and pull a section through and hold it until you wrap again and grab it.
Step 3: Cyan
Keep going.
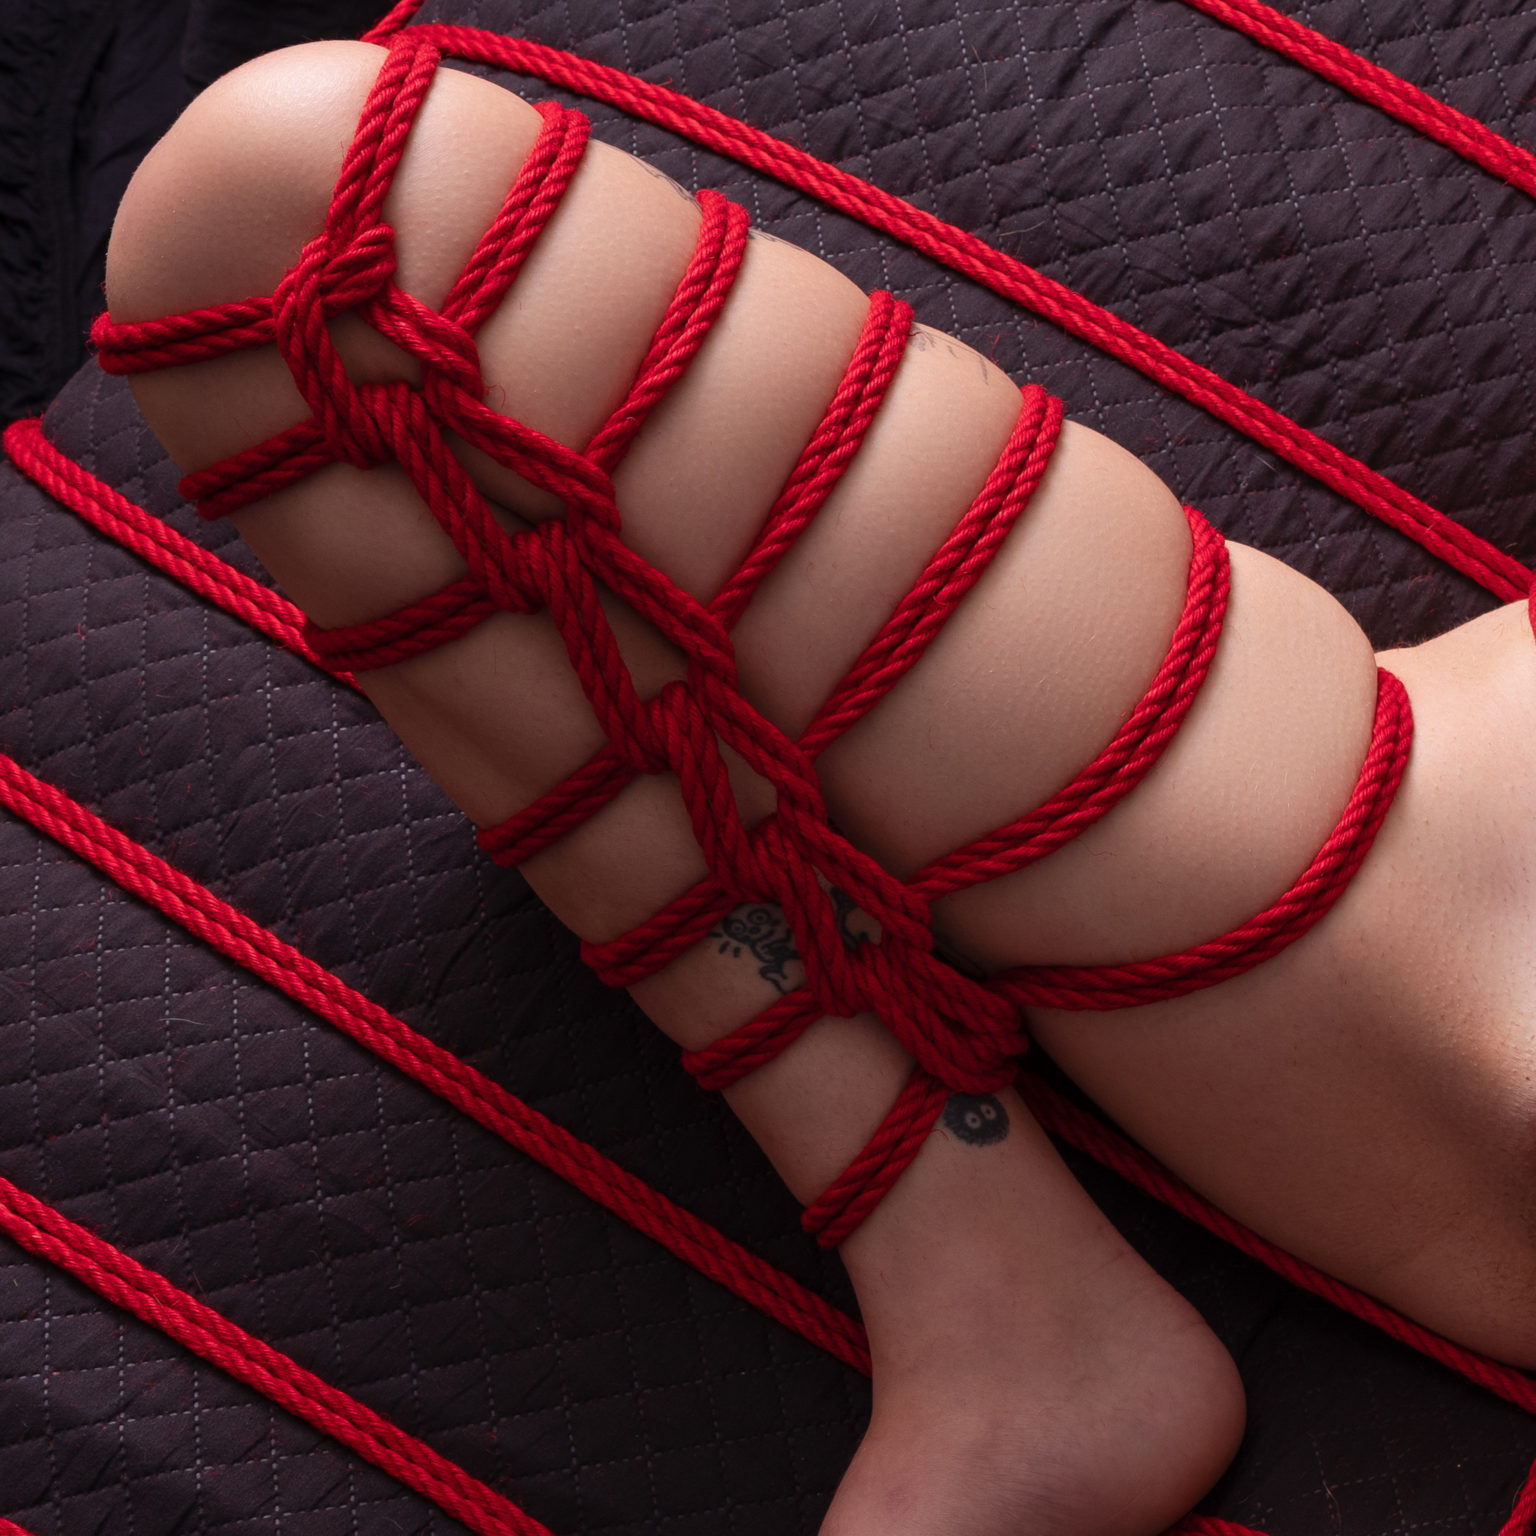
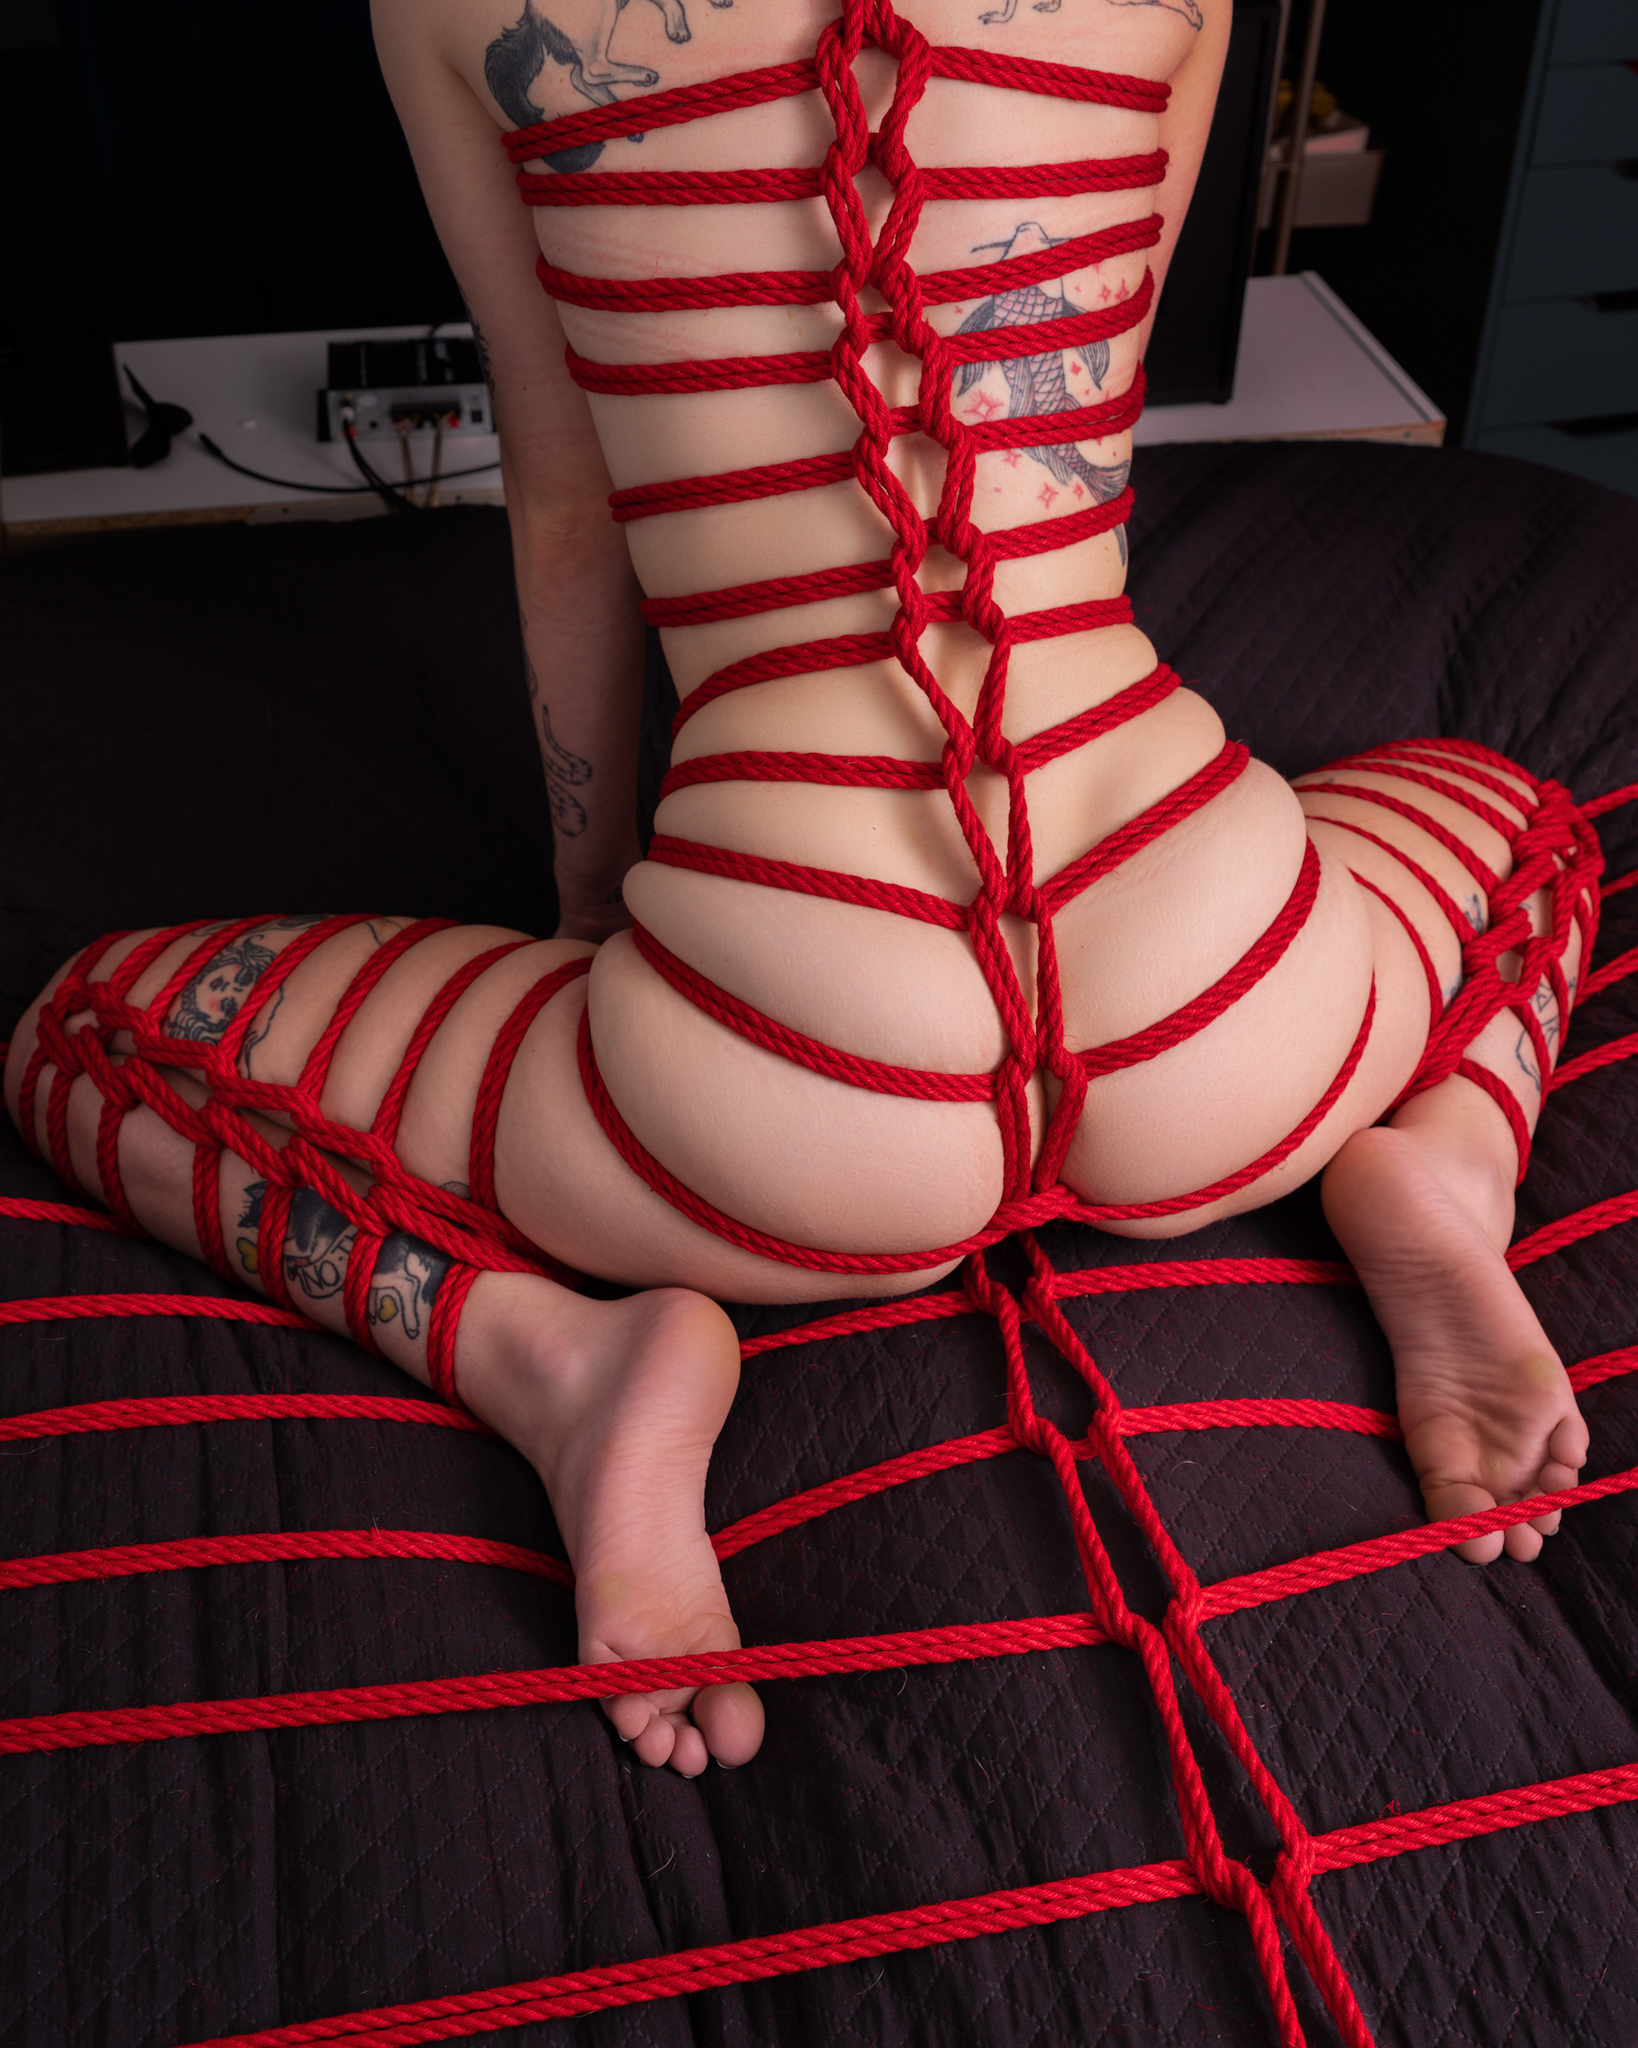
Method 2: The Fake Loop
A fake loop is a pattern that looks like a loop chain, but is not created using the actual loop chain tying method. In this case, what is actually happening is that we are laddering towards the knee with reverse tension, and once we reach the top of the knee, we are returning to the bottom by creating friction on each horizontal rope, giving the illusion of loops. The downside to this method is that it takes longer to perform than a real loop chain, and the other downside is that with a real loop chain, you can move to a new part of the body by creating the chain, but with a fake loop, you will always have to return the rope to where it started in order to complete the other half of the pattern. This can make it less versatile and more time-consuming than a real loop chain.
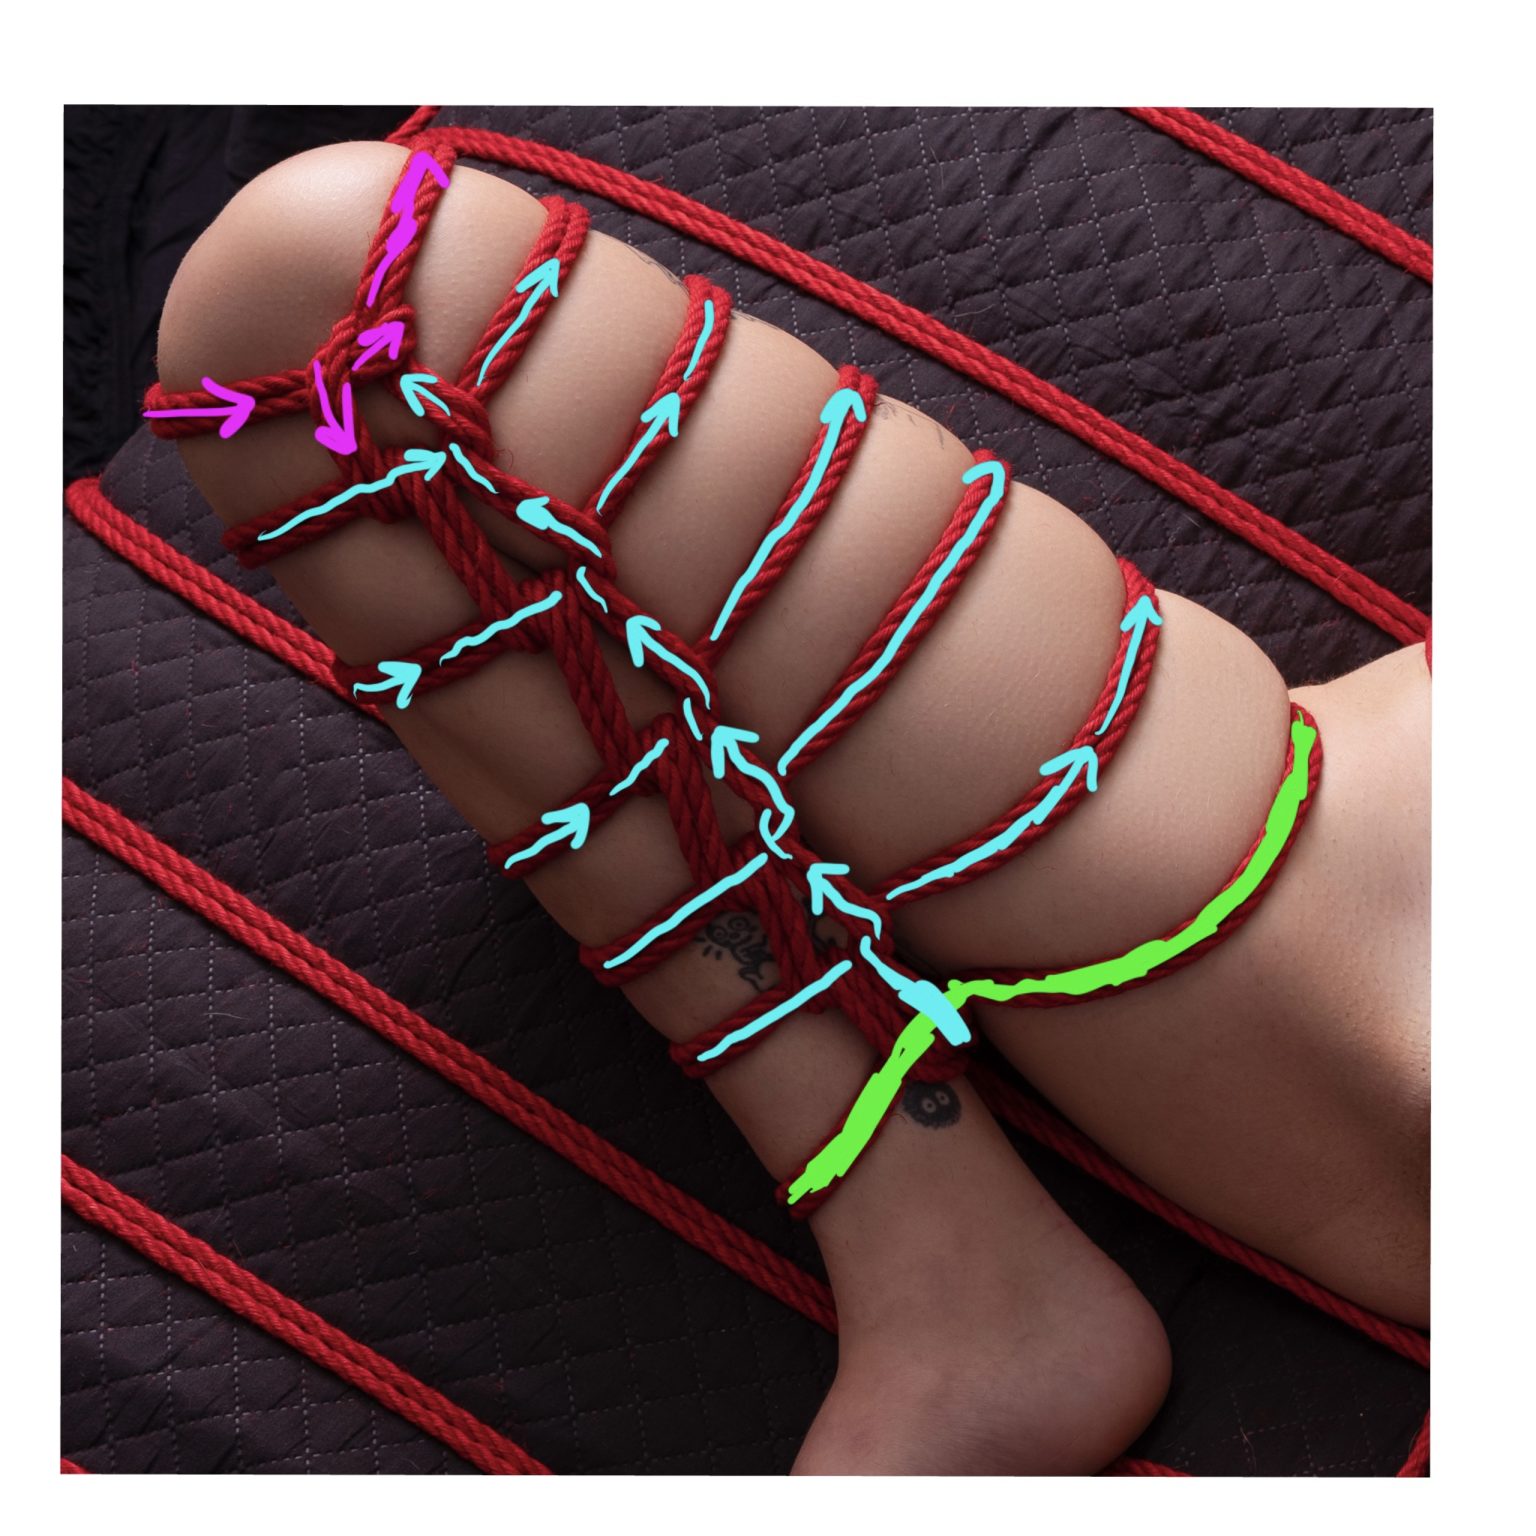
Fake Loop Chain Tracing
Step 1: Lime Green
Start with a single line at the base
Step 2: Cyan
Come under the band from between the thigh and shin and go up and to the right. Go around the leg and go under the line and pull up to form half of the loop. Make sure to offset this ladder so that it will be symmetrical when completed. Continue doing this towards the knee.
Step 3: Magenta
When you reach the top go over the top line and reverse tension and start heading back down
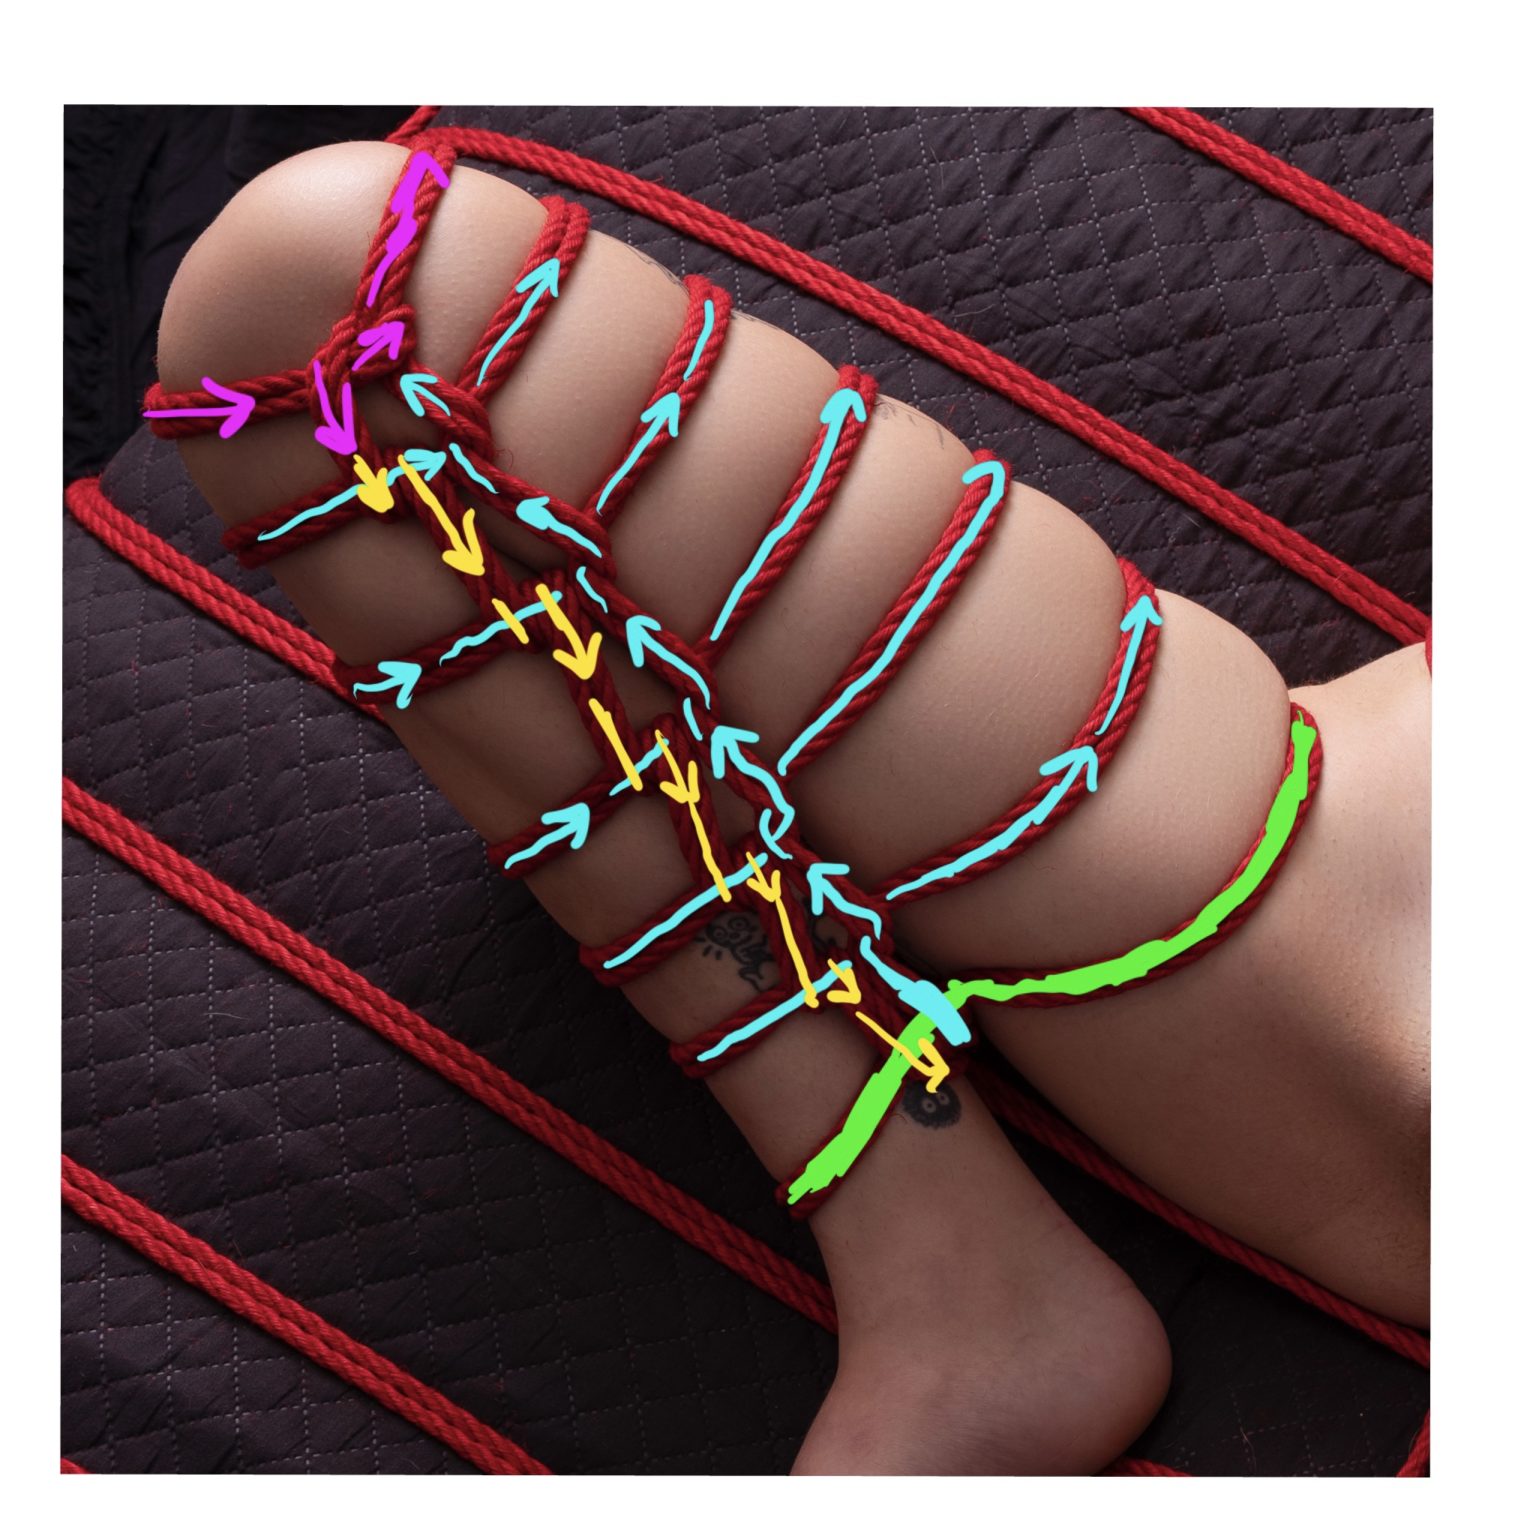
Step 4: Yellow
On the way back down form the other half of the loop by mirroring the side we created when going up. In this case we are doing a loop friction that is outside to inside the entire way down and exiting where we started at the bottom
Another Fake Loop Example
Support Texas Shibari
If you enjoyed this post or found it helpful, please consider supporting Texas Shibari by visiting our Fansly page or making a donation. Your support and donations will help us continue to produce free tying guides for the community. Thank you for your support!